Saturday, July 31, 2010

Citrus Slice - use any citrus fruit in this delicious slice

This is quite similar to the recipe Liss has for Lemon slice on her blog over at Frills in the Hills.  I've tried her recipe and it's fantastic.


For something slightly different, this recipe (from NZ icon, Alison Holst) is a citrus slice in which you can use any citrus fruit that is in season.  We have an orange tree in the back yard which is covered in fruit ready to use so I am going to save some money for the school and take in my own oranges to use in this recipe.


I love anything with a condensed milk, butter, and biscuit base!  An Australian friend of mine teased me that NZ baking always involves crushed biscuits and condensed milk :)


Give this recipe a go with lemons, oranges, mandarins and tangelos in season.


Citrus slice


Base
100 g butter
¾ c (1/2 can) sweetened condensed milk
1 c coconut
Grated rind of 1 or 2 citrus fruit
1 (200g) packet of plain sweet biscuits


Icing
1 c icing sugar
1 T soft butter
Citrus fruit juice


1. Collect equipment and measure all ingredients.


2. Grate rind of fruit using fine side of grater.


3. Make biscuits into crumbs using a food processor


4. Melt the butter in a saucepan.


5. Add condensed milk, finely grated rind of citrus fruit, coconut and the biscuit crumbs to the melted butter. Mix well.


6. Press mixture into a lined slice tin.


7. Mix icing sugar with soft butter than add juice, a few drops at a time, to icing consistency.


8. Spread with a knife and decorate with a fork if desire.


9. Refrigerate until firm.


10. Cut into squares or rectangles and store in the refrigerator.

Cheese Cakes - not what you expect!

I am not sure if this is a New Zealand recipe or not, but I've never seen or heard of them anywhere else. These are a small cupcake with a jam filling and a pastry base - not at all what you would expect a cheese cake to be.

My mum used to buy these as a treat for my brother and I from the local bakery in St Martins, Christchurch (which is sadly no longer there).  I always have lovely memories of my mum and my childhood whenever I eat them.

Give them a try - they are delicious!

Cheese Cakes

200 g flaky pastry (1 ½ sheets)
3 T raspberry jam
125 g butter, softened
½ c sugar
1 c plain flour
1 t baking powder
2 eggs, beaten


1. Preheat oven to 200ºC.


2. Place sugar and butter in a mixing bowl.


3. Sift flour and baking powder in a separate mixing bowl.


4. Beat eggs together in small jug or bowl with a fork or whisk.


5. On a lightly floured surface, roll out pastry to 2 mm thick.


6. Cut out rounds, using a scone or biscuit cutter and use to line patty tins (or muffin tins).


7. Place ½ t of jam in each pastry case.


8. In a bowl, cream butter and sugar until light and fluffy.


9. Add sifted flour/baking powder to creamed mixture alternatively with beaten eggs.


10. Stir to mix.


11. Drop large spoonfuls of mixture into each pastry case.


12. Bake at 200ºC for 15 to 20 minutes or until cooked.

Monday, July 26, 2010

The World's Best Apple Crumble

This is a great apple crumble.  I have a lot of students who pull a rude face when I tell them we are making apple crumble and they say they don't like it.  I always say, "Wait until you try this apple crumble."  And in 99.9% of cases, they agree that it is the best ever.
Enjoy!

ps.  I have a thing for making individual desserts because it makes presentation quick and easy.  Also, in a class situation, it saves arguments about who got the biggest piece.  But if you want to make it in a family size dish, it will work fine.
Apple Crumble
(Serves 2)

Ingredients


Crumble:
1 ¼ c plain flour
4 T brown sugar
100 g butter, cubed


Filling:
225 tinned pie apple (or homemade cooked apple)
1 T brown sugar
¼ t ground cinnamon

Method:


1. Preheat the oven to 180°C.


2. Place the flour and sugar in a bowl and mix well.


3. Taking a few cubes of butter at a time, rub into the flour mixture. Keep rubbing until the mixture resembles breadcrumbs.


4. Mix the second measure of brown sugar and cinnamon together.


5. Spray two ovenproof dishes with cooking spray. Place the fruit into two dishes and sprinkle over the cinnamon-sugar mixture.


6. Stir well, being careful not to break up the fruit.


7. Sprinkle the crumble mixture on top of the fruit.


8. Bake in the oven for 30 minutes until the crumble is browned and the fruit mixture is bubbling.


9. Serve with thick cream, ice cream or custard.

Note:  If you have a food processor, instead of rubbing the butter in by hand, you can just pulse it until it's like breadcrumbs.  Much quicker!

Thursday, July 22, 2010

Super Dooper Cookie Mix

We had a Year 6 Open Day recently where all the year 6 students from local schools came for a taster day at Intermediate School.  Over three days we had 2 x 2 hour sessions per day with different groups of students.  For Food Technology, I had the students make Super Dooper Cookies.  The students each made a batch of cookie mix to take home and bake and also baked a batch of super dooper cookies in class.  The cookies are super dooper because the students can put whatever they want in the mix.  It's a good recipe which makes lots of yummy cookies.  Enjoy!

Super Dooper Cookie Mix

This recipe makes enough mix for two batches of cookies for yourself or a friend


2 ½ c flour
1 c sugar
1 c packed brown sugar
1 t baking soda
½ t salt
200 g shortening (Kremelta)
1 c chocolate chips/M&Ms/Pebbles, dried fruit, etc


1. In a large bowl, combine the first five ingredients and stir until well mixed.


2. Rub in shortening until crumbly or place all ingredients in a food processor and process until mix is crumbly like bread crumbs.


3. Tip mix back into bowl and stir in chocolate chips/M&Ms/Pebbles or dried fruit.


4. Place the mix in a large snap lock bag or in an airtight container. This mix will keep for about 3 months on the shelf or 6 months in the freezer.


How to turn your cookie mix into cookies


3 ½ cups of cookie mix
1 egg
1 t vanilla essence


1. Preheat your oven to 190 ºC.


2. Line two oven trays with baking paper.


3. Place egg and vanilla in a small bowl and beat until well combined.


4. Place the 3 ½ cups of cookie mix into a large mixing bowl.


5. Add beaten egg and vanilla to cookie mix and stir with a wooden spoon until well blended.


6. Place teaspoonfuls on trays, about 5 cm apart (to allow for spreading).


7. Bake for about 10 minutes or until golden brown.


8. Cool on tray for 5 minutes before removing to wire racks.

Wednesday, July 21, 2010

Foodie Teacher Fashion

In my job, I need to wear an apron every day.

The students all wear a standard dark green drill apron, but that's too much like a school uniform for me and being the fashion conscious Food Tech teacher I am, LOL, I like to mix it up a bit...


I have the "Desperate Housewife" number for Mondays (and other days when I am feeling either desperate or housewifey) - The reason why it is usually a Monday you will find me wearing this is because Monday night is Desperate Housewives on TV2 and it gets me in the show mood.  I often find a Year 8 boy wearing this, which always gives me a giggle!

Other days, I wear my cupcake apron - the girls like this one a lot.

I also have a navy blue and white striped apron - professional, but still more interesting than dark green.

I also have a few aprons I got free with magazines such as Cuisine, Donna Hay and Better Homes and Gardens - thank you to them!

Then, just for fun, I have a NZ sheep apron which my Dad gave me when I was living in Australia.
This is one that I will occasionally let a student wear if I am feeling particularly generous and if they ask nicely :)

What to do about students who don't like food


I had my first session with a Year 8 class today.

When the bell rang for first break, one of the students stayed behind to talk to me.  He told me that he wanted to let me know that he was a very fussy eater and was it OK if he didn't eat the food he made today.

I was surprised and told him we were making tacos and burritos which are a really popular food with most kids and I thought he would be excited about making them and eating them, but instead he said, "No, I don't like any of the food that goes into those."

I reminded him about the class rule which is if  he isn't allergic to a food or couldn't eat it for cultural reasons that he needed to try at least one spoonful.  After that, if he still didn't like it, then he didn't have to eat it, but at least he had tried it.

He said "OK" and headed out to break.

In the second half of the lesson he got right into the making of the dish but just when it came to eating time, he asked to go to the toilet.  He was out of the class for a while and when he walked back in, he announced to everyone that he wasn't eating anything.

I didn't make an issue of it, but asked him to get on with the clean up and dishes if he wasn't going to eat.

At the end of the lesson, I asked him to wait behind.  I think he thought he was going to get a blasting from me so he looked surprised when I said, "How are we going to make Food Technology work for you?"

He smiled and said, "I don't know.  Are we going to make muffins?"

I laughed and said, "It's not part of the plan, but I'm guessing you like muffins?"

"As long as they're chocolate!" he said.

So then we had a bit of a chat about what he ate at home, what he liked to make and it turned out, as is often the case, that there was stuff going on at home...

So I am glad I didn't just read him the riot act!

I told him next week we were making sushi and asked him if he had ever tried it.

"No way!" he said.

"Do you like rice?"

"Yep."

"What about chicken?"

"Yep."

"So you'll eat rice and chicken sushi?"

"OK."

So we shook on it and he assured me that in next week's lesson he will try ONE piece of chicken sushi.

Watch this space.  I'll let you know next week if I get the "I don't like most food" kid to eat sushi :D

Tuesday, July 20, 2010

A delicious breakfast cereal - Ba Ba Ba Boom!

This is a new recipe for my Year 7 "Presents in a Package" unit.

I developed this recipe during the school holidays and I am using it for the first time next week.

I hope the students enjoy it.  I've made a few different versions and it is really yummy.


Ba ba ba Boom! Breakfast Cereal


Ingredients
2 c rolled oats
¼ c unprocessed wheat bran
¼ c wheat germ
¼ c pepitas (pumpkin seeds) or sunflower seeds
1 t ground cinnamon
1/3 c honey
1 T vegetable oil
½ c flaked coconut
½ c of rice bubbles, corn flakes, puffed wheat, bran flakes or Allbran
½ c sultanas or raisins


1 T of dried fruit of your choice (coarsely chopped): You may choose up to 5 fruits from the following list (a total of 5 T)


Apricots
Apples
Cranberries
Strawberries
Dates
Peaches
Mango
Goji berries
Yoghurt-covered raisins
Cherries
blueberries


1. Preheat oven to 180°C.

2. Collect all ingredients and equipment before you start cooking!

3. Spread rolled oats out evenly in a large oven tray and roast uncovered for 5 minutes.

4. Stir wheat bran, wheat germ, pepitas and cinnamon into the oats.

5. Mix honey and oil together. Drizzle evenly over ingredients in tray. Stir to combine. Roast uncovered for 5 minutes.

6. Add coconut to oven tray. Stir to combine. Roast uncovered for 5 minutes.

7. Remove tray from oven and cool for 5 minutes.

8. Return oat mixture to large bowl. Stir in remaining ingredients.

9. Place ½ c of cereal in a bowl and serve with milk or yoghurt.

10. Divide remaining ingredients between your snap lock bags and attach label.
Enhanced by Zemanta

Sunday, July 18, 2010

First day of Term 3 - World Wide Kai

First day back at school today. I'm starting a new unit of work with Year 8 this term called World Wide Kai. It's an International Food unit.

Students will choose a culture other than their own and prepare a meal or dish from that culture. Each dish will be presented as part of a shared meal for the whole class.

The first practical for today was Beef and Bean Tacos/Tortillas.

You may want to tone down the chilli a bit and only put in 1/4th or 1/8th of a teaspoon because half a teaspoon knocked the socks off many of the kids!

Check out the "Taco Trivia" at the bottom of this post.


Beef & Bean Tacos/Tortillas

1 t crushed garlic
80 g lean beef mince
½ t chilli powder
¼ t ground cumin
1 c canned kidney beans, rinsed and drained
2 T tomato Paste
½ c (125 mL) water
1 tomato, chopped coarsely
Cooking oil spray

4 taco shells or 4 tortillas (or 2 of each)
4 leaves of iceberg lettuce, shredded finely

Salsa Cruda

½ Lebanese cucumber, seeded, chopped finely ½ small red onion, chopped finely
1 small tomato, seeded, chopped finely 1 t sweet chilli sauce

1. Preheat oven to 180ºC.
2. Heat a large frying pan and spray with coking oil spray
3. Cook garlic and beef, stirring until the beef is browned all over.
4. Add chilli, cumin, beans, tomato paste, water and tomato.
5. Reduce heat and cook for about 10-15 minutes until mixture thickens slightly.
6. Meanwhile, place taco shells upside-down on an oven tray. Heat uncovered for 5 minutes or until warmed through. If using tortillas, place on a plate in the microwave and cook on high for 20 seconds.
7. Make salsa cruda by combining ingredients in a small bowl.
8. To serve, fill taco shells with beef mixture, lettuce and salsa cruda. If using tortillas, place ingredients in centre of tortilla, fold up the bottom and then fold in the sides.

Taco Trivia


1. What country do tacos and burritos originally come from? …………………………………………………

2. What language is spoken there? ……………………………………………………………………………………

3. What does salsa mean in English?

a. dip
b. sauce
c. spicy
d. dance

4. What does cruda mean in English?

a. crude
b. spicy
c. small
d. raw

5. In English, Tortilla translates to 'toast' ……………………………………………… TRUE/FALSE

6. If you were unable to eat beef, what could you replace the beef mince with?

…………………………………………………………………………………………………………………………………………………

Food Review - Mt Eden Village Cafes

Frasers and Sierra Café - Mt Eden Village, Auckland

Frasers Café

I’ve been going to Frasers (434 Mt Eden Road, Mt Eden) for years. The food is consistently good and the service is quick and friendly. Frasers is open every day until late so it’s great for a family breakfast, brunch, lunch or early dinner. It’s noisy enough to drown out most kid’s noise so you won’t have to worry about shushing your kids if their volume switch is set to loud.

Kids Menu:
There is a small kids menu which is available all day (and night) or a standard ‘adult’ menu. They have a breakfast/lunch menu which is offered until 4 pm and a dinner menu which operates from 4 pm onwards.

My kids usually share the ‘Breakfast’ from the kids menu which is Bacon, Eggs, Sausage and Toast for $8.90. If they are extra hungry, they sometimes share the Pancake Stack with fresh banana and maple syrup for $8.90. Also available on the kids menu is a BLT sandwich for $8.90 and a chocolate sundae for $6.90.

I would also recommend the Hokkien Noodle Salad with BBQ chicken for $19.80. It serves two children generously, so ask for two plates and divide it. It’s very tasty, but not at all spicy and the chicken is very tender.

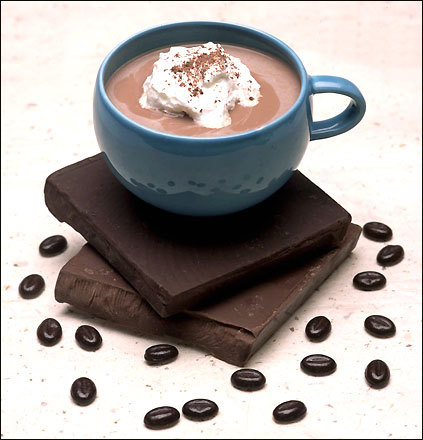
For drinks there are the usual juices and water, plus they make very good fluffies (babycinos) with any kind of milk (my daughter drinks soy). Fluffies are served in cute espresso cups with two marshmallows.

Pram access:
The tables are packed in very close to each other so there is no room at all for prams inside. Unless you are happy to eat outside (at tables on the footpath), I would recommend you leave your pram at home.

Extras:
• High chairs are available near the counter and there is also a basket of kids’ picture books.
• Another good thing is a water filter and glasses on the counter so you can help yourself to water (for free) or fill up sippy cups and bottles. If your kids insist on drinking out of a glass (which mine do), the glasses are small so won’t flood the place if they get knocked over.

Negatives:
• Take care with the café chairs. They are quite light and tip over easily if your toddler climbs up on them.
• The lack of pram access may also be a turn off for parents of young babies.
• Frasers is not a particularly cheap outing with most adult meals priced from $19.80.

Sierra Café, Mt Eden

As a comparison, I visited Sierra Café (418 Mt Eden Road, Mt Eden). We’d headed to Frasers for lunch and it was packed out so we decided to try Sierra.

Sierra is a much roomier café than Frasers with far fewer tables. There is also a proper outdoor eating area in a courtyard out the back of the restaurant, which is better than the footpath tables at Frasers. However, Sierra is only open for breakfast, lunch and afternoon tea so we will be sticking with Frasers for dinner.

Kids Menu:
Sierra has a big menu with lots of choices to keep the kids happy. My two ordered the Poached eggs on Toast but you can order your eggs any way you like for $10.50

I only noticed that a kids menu was available (on request) after we had ordered so I will have to check that out another time.

In addition to the blackboard menu, Sierra has sandwiches, quiches and Panini ready to purchase over the counter and there is also a wide range of scones, cakes and cookies.

Pram Access:
There is enough room next to most tables for one pram, but not enough for your whole coffee group and their full-sized three-wheelers.

Extras:
• Sierra has wooden booster seats for older toddlers as well as high chairs.
• A water cooler with glasses is situated in the middle of the café. Take care with the glasses as they are bigger than at Frasers.

Negatives:
• The tables are a standard café size but the food comes on huge plates (and mine was chipped!) so if you are sitting across from another adult with a meal, both your plates hang over the edge of the table, which is not ideal.
• Like Frasers, Sierra Café is not cheap. For two servings of poached eggs, an open chicken sandwich and a burger (with two hot chocolates and two fluffies), we paid $63.60.
• I also prefer café’s where fluffies are free with a coffee purchase. $1.60 (the 60 cents was for the soy milk) is a bit overpriced for a tiny bit of milk fluff in an espresso cup).

In conclusion, Frasers would be my top pick, but Sierra is a worthy alternative if you want to go out to eat but need to bring your pram along.

Saturday, July 17, 2010

Pizza Mix

Everyone loves pizza and a homemade dough is so much better than a bought one.

This is quite an involved lesson as making the dough, kneading it and then putting the pizza toppings together all takes time, but it is well worth the effort.

This is a quick-mix dough which does not need rising time which is an extra bonus.

The thing which makes this dough special for the students is that they choose the various herbs and spices to flavour the base and to make it an original product. Everyone makes their own pizza too (instead of in pairs), which means they all have the chance to make a base.

As with all of these lessons, the students make and package the mix first before making and baking a real pizza.

Pizza Mix

4 c flour
2 x 8 g sachets instant yeast
2 t sugar

1. In a bowl, mix together the flour, yeast and sugar.
2. Add 1 or more flavourings of your choice from the list below.

Flavouring ingredients:

1 t Garlic powder
1 t Oregano
1 t Parsley
1 t Basil
1 t Tarragon
1 t Thyme
1 t Rosemary
1 t other herbs (as provided)

3. Take out one cup of mixture and put it in a snap lock bag. Take out another cup of mixture and put it in a second snap lock bag. Attach the instructions – this is for you and your partner to take home to give as a gift.
4. Divide the pizza mix left in the bowl into 2 bowls.


Instructions for making the pizza

• 1 c pizza mix
• 1 T olive oil
• 90 mL warm water

• 2 T tomato paste or pizza sauce
• 1 c grated cheese (mozzarella is best)
• Your favourite pizza toppings – mushrooms, pineapple, ham, capsicum, onions, etc

1. Preheat the oven to 190 ºC.
2. Put the pizza mix into a bowl.
3. Mix the warm water and oil together
4. Pour the oil and water into the dry ingredients and mix until the dough just comes together.
4. Turn onto a lightly floured board and knead for approximately 5 – 8 minutes or until elastic (when you press the top it should bounce back and leave no indentation).
5. Divide the dough into two pieces and form into round, flat shapes.
6. Place on an oven tray which has been lined with baking paper.
7. Spread the pizza bases with tomato paste then sprinkle with cheese.
8. Arrange other pizza ingredients on top of the cheese and bake at 190º C for 15 to 20 mins or until pizza crusts are crisp and the cheese is melted.

Super Yummy Chocolate Brownie Mix

This brownie mix is one of my most popular lessons. The students just love designing their own original brownies.

It's a super-easy recipe that works well whatever is added to it. Although it is part of my Year 7 "Presents in a Package" unit, I have also used it in my Year 8 "City Cafe" unit as it is one of those easy, never-fail recipes that is also very, very yummy.

For the first part of the lesson, the students make up the mix and package it. Then for the second part of the lesson, they make the mix again, but this time they mix in eggs and oil and bake it in the oven. Students love taking home a finished product in addition to the brownie mix.

Although the brownie mix is supposed to be given as a gift to a friend or family member, most of my students use it as an opportunity to make the brownies again at home. I am happy that they do this because if they are cooking at home, it means they are gaining confidence and learning new skills :)


Brownie Mix
(Between 2)

1 c plain flour
1 t baking soda
½ t salt
2/3 c packed brown sugar
1/3 c cocoa
2/3 c sugar

• Combine flour, baking soda and salt, brown sugar, cocoa and sugar in a bowl. This is your basic brownie mix

• Add ½ cup of your choice of ingredients from the following list:

• White chocolate chips
• Dark chocolate chips
• M & Ms
• Marshmallows (cut into quarters) or mini marshmallows
• Glace cherries
• Dried apricots (chopped)
• Dried cranberries

• Stir your chosen ingredients into the basic brownie mix.

• Evenly divide your mixture into two bags (1 each to take home) and attach the instructions. Don’t forget to write your extra ingredients in the space provided

Instructions to add to your Brownie Mix before giving it as a gift:

Combine contents of bag with:

2 eggs
½ teaspoon vanilla extract
1/3 cup (75 mL) vegetable oil

Pour into a greased/lined brownie tin.

Bake at 180ºC for about 15 minutes until the top is set.

How to make Brownies (if you just want to bake them without just making the mix)

½ c plain flour
½ t baking soda
¼ t salt
1/3 c packed brown sugar
3 T cocoa
1/3 c sugar

2 eggs
½ t vanilla
1/3 c (75 mL) oil


• Preheat the oven to 180°C.

• Line a brownie tin with baking paper.

• Mix together the flour, baking soda, salt, brown sugar, cocoa and sugar in a bowl.

• Add ½ cup of your choice of ingredients from the following list:

• White chocolate chips
• Dark chocolate chips
• M & Ms
• Marshmallows (cut into quarters) or mini marshmallows
• Glace cherries
• Dried apricots (chopped)
• Dried cranberries

• Add the eggs, vanilla and oil to the flour mixture and stir with a wooden spoon until well combined.

• Pour mixture into your prepared tin.

• Bake in oven for 15 minutes or until top is set.

• Leave to cool for 10 minutes before cutting into small pieces.


Friday, July 16, 2010

Hot Chocolate Mix

This is a great starter lesson for a Year 7 class and is part of my "Presents in a Package" unit.

Through this recipe, students learn about correctly measuring ingredients and then have the choice to design their own hot chocolate mix using a range of different ingredients.

Because this is a simple recipe, it allows enough time in the lesson to teach students about classroom routines, finding equipment and learning to work with a partner.

Once the mix is made, give students the opportunity to try their mix by making a hot chocolate to drink in class.


Hot Chocolate Mix Recipe

(Serves 2)

Basic recipe

• ¾ c non-fat dried milk powder
• I T plus 1 t powdered coffee whitener
• 3 T plus 1 t icing sugar
• 2 T plus 1 t cocoa powder (unsweetened)


Preparation:

1. Collect equipment: Measuring cups, measuring spoons, bowl, sieve, dinner knife, whisk, dinner spoon, coffee mug, teaspoon.

2. Collect ingredients.

3. Sift the milk powder, coffee creamer, icing sugar and cocoa powder into a bowl to remove any lumps.

4. Mix thoroughly with a wire whisk to blend.

5. Add variations from list below and mix thoroughly

6. Divide between two snaplock bags.

7. Attach instructions and ingredient list.


Variations

• 3 T mini marshmallows
• ½ t ground cinnamon
• 3 T dark chocolate chips
• 3 T white chocolate chips
• 2 T raspberry powdered drink mix